Recent Posts
Essential Fire Prevention Tips for Homes and Businesses
2/20/2025 (Permalink)
 Fire prevention is crucial for safeguarding your home or business.
Fire prevention is crucial for safeguarding your home or business. Fires can cause devastating damage, but with the right precautions, you can significantly reduce the risk. Whether you're a homeowner or a business owner, following these fire safety tips can help protect your property and loved ones.
1. Install and Maintain Smoke Alarms
Why It Matters: Smoke alarms provide early warnings that can save lives and minimize property damage.
- For Homes: Install smoke alarms in every bedroom, outside sleeping areas, and on each level of your home.
- For Businesses: Place alarms in high-risk areas like kitchens, break rooms, and storage spaces.
- Maintenance: Test smoke alarms monthly, replace batteries yearly, and install new units every 10 years.
2. Practice Safe Cooking Habits
Why It Matters: Cooking is a leading cause of residential fires.
- Never leave cooking food unattended.
- Keep flammable materials—like towels, curtains, and paper—away from stovetops.
- For businesses, ensure kitchen staff are trained in fire safety and equipment use.
3. Use Electrical Systems Safely
Why It Matters: Faulty wiring and overloaded outlets can lead to electrical fires.
- Avoid overloading power strips and outlets.
- Inspect cords regularly and replace damaged ones.
- Hire licensed electricians for regular inspections and repairs.
4. Store Flammable Materials Properly
Why It Matters: Improper storage of flammable materials can increase fire risk.
- Store flammable liquids in original containers, away from heat sources.
- Businesses should comply with OSHA regulations for handling and storing flammable substances.
5. Create and Practice a Fire Escape Plan
Why It Matters: A well-prepared escape plan can save lives.
- For Homes: Develop a plan with two exits per room and a designated meeting point. Practice it regularly.
- For Businesses: Establish an emergency action plan, conduct fire drills, and post clear evacuation routes.
6. Use Heating Equipment Safely
Why It Matters: Space heaters and fireplaces are common causes of winter fires.
- Keep space heaters at least three feet away from anything flammable.
- Schedule annual chimney and fireplace inspections and cleanings.
7. Install Fire Suppression Systems
Why It Matters: Fire extinguishers and sprinklers can control small fires before they spread.
- Place fire extinguishers in easily accessible locations.
- Businesses should install automatic sprinkler systems for added protection.
Fire Damage Restoration & Recovery Services
Even with the best fire prevention measures, accidents can still happen. If your home or business experiences fire damage, professional restoration services are essential.
Our Expert Fire Damage Restoration Services:
- Smoke and Soot Cleanup – Eliminating harmful residue and restoring air quality.
- Odor Removal – Using advanced techniques to remove lingering smoke smells.
- Structural Repairs – Restoring fire-damaged areas to their original condition.
As a trusted leader in fire damage restoration, our highly trained professionals in Natick, Milford, and surrounding areas have the expertise and equipment needed to restore your home or business efficiently.
Protect your property today! Implement these fire safety tips and contact us for expert fire damage restoration when needed.
A Healthy Home for a Healthy Heart: Simple Ways to Protect Your Well-Being
2/12/2025 (Permalink)
 While diet, exercise, and regular check-ups are essential, your home environment also plays a critical role in your overall well-being.
February is American Heart Month, a time to focus on cardiovascular health and the steps we can take to protect our hearts.
While diet, exercise, and regular check-ups are essential, your home environment also plays a critical role in your overall well-being.
From indoor air quality to stress reduction, small changes in your living space can positively impact your heart health. Let’s explore the connection between a healthy home and a healthy heart, along with practical ways to create a safer, cleaner, and more supportive environment.
Breathe Easy: Improve Indoor Air Quality
Poor indoor air quality can lead to respiratory issues, increased stress, and even cardiovascular strain. Dust, mold, and airborne pollutants can trigger inflammation, making it harder for your heart to function optimally.
Heart-Healthy Home Tips:
- Clean regularly – Dust surfaces, vacuum with a HEPA filter, and wash bedding frequently to reduce allergens.
- Control humidity – Use a dehumidifier to prevent mold growth and keep indoor humidity between 30-50%.
- Change air filters – Replace HVAC filters every 1-3 months for clean air circulation.
- Let in fresh air – Open windows when possible to improve ventilation.
Declutter for a Stress-Free Space
A cluttered home can contribute to feelings of overwhelm, which may increase blood pressure and put unnecessary strain on your heart. Creating an organized, peaceful space can help promote relaxation and mental well-being.
Heart-Healthy Home Tips:
- Declutter daily – Spend just 10 minutes a day tidying up.
- Organize smartly – Arrange items for easy access and storage.
- Create relaxation zones – Designate areas for unwinding, like a cozy reading nook or meditation space.
- Address water damage promptly – Repair leaks and floods immediately.
- Use exhaust fans – Ventilate kitchens, bathrooms, and laundry rooms to reduce moisture.
- Check for mold regularly – Inspect hidden areas, like behind appliances and under sinks.
Reduce Chemical Exposure
Many household cleaning products contain volatile organic compounds (VOCs) that can contribute to inflammation and stress, potentially affecting heart health.
- Choose natural cleaners – Use vinegar, baking soda, and lemon for non-toxic cleaning.
- Read product labels – Opt for low-VOC and fragrance-free options.
- Ventilate while cleaning – Open windows or use fans to improve airflow.
Create a Safe and Supportive Environment
A well-maintained home reduces risks that can lead to stress or injury. Addressing potential hazards not only keeps you safe but also provides peace of mind.
- Install smoke detectors – Ensure they’re functional and in key areas.
- Eliminate trip hazards – Secure loose rugs and clear cluttered walkways.
- Improve lighting – Brighten dim areas to reduce eye strain and prevent falls.
Your Heart Deserves a Healthy Home
Caring for your heart isn’t just about diet and exercise—it’s about creating an environment that supports your well-being. By keeping your home clean, organized, and free from harmful elements, you can help protect your cardiovascular health while enjoying greater peace of mind.
If your home needs professional cleaning, mold remediation, or restoration services, our team is here to help. As a trusted leader in the restoration industry, Natick, Milford, Milford has the expertise and equipment to restore your home or business to a safe and healthy condition.
Why SERVPRO Is the Trusted Partner for Insurance Professionals
2/4/2025 (Permalink)
 When disaster strikes, trust us to be the reliable, efficient partner your insurance team needs.
Property owners rely on their insurance companies to restore normalcy when disaster strikes. Insurance professionals, in turn, need a restoration partner they can trust to deliver consistent results, streamlined processes, and exceptional service. We have become a trusted partner for insurance professionals nationwide, offering seamless collaboration and efficient claims handling to ensure customer satisfaction and successful outcomes.
A Proven Process Built for Insurance Success
Our expertise lies in their ability to respond quickly, mitigate damages, and restore properties efficiently. Here’s how they support insurance professionals every step of the way:
1. Rapid Response, 24/7 Availability
We understand that time is critical in restoration. Their network of over 2,000 franchise locations ensures that help is always nearby. From water damage to fire, mold, or storm cleanup, our teams are ready to respond within hours, minimizing secondary damage and reducing overall claim costs.
2. Transparent Communication and Documentation
Insurance professionals need clear, accurate information to process claims effectively. We provide detailed documentation at every stage of the restoration process, including:
- Photos of damage and progress
- Itemized estimates
- Daily job updates
- Proof of restoration completion
This transparency ensures that adjusters, agents, and customers remain informed, eliminating surprises and delays in the claims process.
3. Industry-Leading Technology
We use advanced restoration techniques and proprietary software to track jobs and document progress. Their digital tools allow insurance professionals to access real-time updates and reports.
4. Standardized Pricing for Consistency
With us, insurance professionals can trust that pricing aligns with industry standards. They utilize the same estimating software that insurance companies use, ensuring consistency, accuracy, and fair pricing on every job.
5. Specialized Training and Certification
Our team members undergo rigorous training to stay current with industry standards and best practices. As certified professionals, they are equipped to handle a wide range of restoration scenarios, including complex commercial claims.
Insurance professionals choose us because they deliver more than just restoration—they provide peace of mind. Their ability to streamline claims, reduce costs, and exceed customer expectations makes them the ideal partner for insurance companies of all sizes.
When disaster strikes, trust us to be the reliable, efficient partner your insurance team needs. As a trusted leader in the restoration industry, SERVPRO of Framingham has the advanced training and equipment needed to restore your home and business.
Why SERVPRO Is the Preferred Partner for Insurance Professionals
2/4/2025 (Permalink)
 With advanced training and state-of-the-art equipment, our teams in Natick, Milford, and surrounding areas are ready to restore homes and businesses
When disaster strikes, property owners turn to their insurance providers for swift restoration and peace of mind. In turn, insurance professionals need a trusted restoration partner who delivers consistent results, efficient processes, and top-tier service. SERVPRO has earned that trust nationwide, offering seamless collaboration and expert claims handling to ensure smooth resolutions and satisfied customers.
A Proven Process for Insurance Success
Our strength lies in rapid response, expert damage mitigation, and efficient property restoration. Here’s how we support insurance professionals at every step:
1. 24/7 Rapid Response
Time is critical in restoration. With a network of over 2,000 franchise locations, SERVPRO is always nearby, ready to respond to water, fire, mold, or storm damage within hours. Quick action minimizes secondary damage and reduces overall claim costs.
2. Transparent Communication & Documentation
Clear, accurate documentation is essential for efficient claims processing. We provide:
- Detailed photos of damage and restoration progress
- Itemized estimates
- Daily job updates
- Proof of restoration completion
This transparency keeps adjusters, agents, and policyholders informed, eliminating surprises and delays.
3. Industry-Leading Technology
Our advanced restoration techniques and proprietary software streamline job tracking and documentation. Insurance professionals can access real-time updates, ensuring a smooth claims process.
4. Standardized Pricing for Fair & Consistent Estimates
We use the same estimating software as insurance companies, ensuring industry-standard pricing, accuracy, and fairness on every job.
5. Certified Experts You Can Rely On
SERVPRO team members undergo extensive training and certification to stay at the forefront of industry standards and best practices. Whether handling residential or complex commercial claims, our professionals are equipped to manage any restoration challenge.
A Partner You Can Trust
Insurance professionals choose SERVPRO not just for restoration services, but for the confidence and peace of mind we provide. By streamlining claims, reducing costs, and exceeding customer expectations, we make the restoration process smooth and stress-free.
When disaster strikes, trust SERVPRO to be the reliable, efficient partner your insurance team needs. With advanced training and state-of-the-art equipment, our teams in Natick, Milford, and surrounding areas are ready to restore homes and businesses to preloss condition—quickly and professionally.
Preparing Your Home or Business for Storm Season
1/21/2025 (Permalink)
 Be prepared for storm season, and rest assured that SERVPRO of Natick, Milford is here to help when you need us most.
Storm season can present unexpected challenges, but with proper preparation, you can protect your property and reduce potential damage.
Steps to Fortify Your Property
Seal Windows and Doors
Inspect for gaps or cracks and apply weatherproofing materials to keep water out.
Maintain Gutters and Downspouts
Clear debris to ensure proper water drainage and prevent water buildup.
Secure Outdoor Items
Bring in or secure outdoor furniture, tools, and equipment to prevent damage from strong winds.
The Importance of an Emergency Plan
Having an emergency plan ensures you’re prepared to act quickly and safely. Key elements to include:
Emergency Contacts
Keep essential numbers, including SERVPRO’s, readily available for quick restoration services.
Evacuation Routes and Safe Shelter
Identify safe spaces and evacuation routes to protect your family or employees.
Inventory of Important Documents and Valuables
Store critical paperwork and valuable items in waterproof containers to keep them safe.
When storms strike, SERVPRO of Natick, Milford, and Franklin is ready to help. We specialize in:
Floodwater and Wind Damage Restoration
From water removal to structural repairs, we handle every step of the process.
Rapid Response
Our team works quickly to minimize downtime and further damage to your property.
Advanced Training and Equipment
As a trusted leader in the restoration industry, we’re equipped to restore your home or business efficiently and effectively.
Be prepared for storm season, and rest assured that SERVPRO of Natick, Milford is here to help when you need us most. Stay safe and let us handle the restoration!
Fire Damage: What to Do Before Help Arrives
1/16/2025 (Permalink)
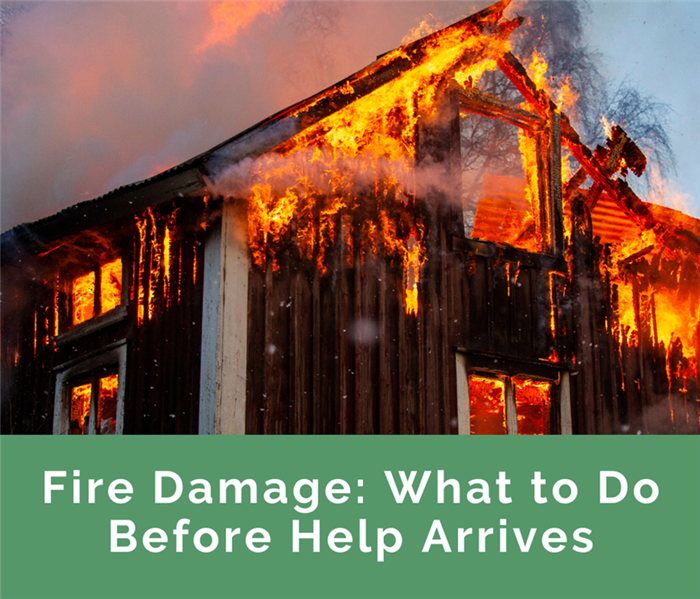 Here’s how to manage fire damage safely until our team arrives
Experiencing a fire can be overwhelming, but taking the right steps afterward can significantly impact the recovery process. Here’s how to manage fire damage safely until our team arrives:
1. Prioritize Safety
Your safety is the top priority. Do not re-enter the property until the fire department confirms it is safe. Be aware of potential risks like structural instability, smoke inhalation, and electrical hazards.
2. Document the Damage for Insurance
When it’s safe to do so, take clear photos and videos of the damage. Proper documentation is essential for filing insurance claims and ensuring you receive the compensation you’re entitled to.
3. Avoid DIY Cleaning
Smoke and soot damage require professional cleaning techniques. Attempting to clean the affected areas on your own can spread harmful contaminants or worsen the damage. Leave the restoration to experts with the right tools and knowledge.
4. Professional Fire and Smoke Restoration
When we arrive, our team will assess the damage, develop a customized restoration plan, and begin cleaning, deodorizing, and repairing your property. We are equipped to handle even the most severe fire damage scenarios.
As a trusted leader in the restoration industry, Natick, Milford, and surrounding areas rely on our advanced training and state-of-the-art equipment to restore homes and businesses efficiently and effectively.
The Hidden Dangers of Mold and How We Can Help
1/9/2025 (Permalink)
 At SERVPRO of Natick/Milford, we understand that addressing mold requires more than surface cleaning.
Mold might seem like a minor inconvenience at first, but if left untreated, it can escalate into a serious problem that threatens the structural integrity of your property.
Let’s explore the hidden dangers of mold, what causes it, and how our team can help protect your home or business.Common Causes of Mold in Homes and Businesses
Mold thrives in moist, humid environments, making certain areas more susceptible than others. Common causes include:
- Water Damage: Flooding or leaks can create the perfect breeding ground for mold.
- Plumbing Issues: Leaky pipes often lead to hidden moisture buildup, encouraging mold growth.
- Poor Ventilation: Insufficient airflow traps humidity in spaces like bathrooms, basements, and kitchens.
- Condensation: Windows, pipes, and poorly insulated walls can harbor moisture.
Understanding these causes is the first step in preventing mold from taking hold in your property.
Signs You Need Professional Mold Removal
Spotting mold early can save you from costly repairs and health risks. Keep an eye out for these warning signs:
- Musty Odors: A persistent, unpleasant smell is often the first indicator of mold.
- Discoloration: Dark spots or stains on walls, ceilings, or floors may signal mold growth beneath the surface.
- Recurring Moisture Issues: If you frequently notice damp areas, mold could be present.
If you detect any of these signs, it’s crucial to act quickly.
At SERVPRO of Natick/Milford, we understand that addressing mold requires more than surface cleaning. Our proven remediation process ensures mold is eliminated at its source:
- Thorough Assessment: We evaluate the extent of the mold problem to develop a customized plan.
- Containment: Preventing mold spores from spreading during cleanup is critical.
- Advanced Removal Techniques: Our team uses specialized equipment and methods to safely remove mold.
- Restoration: Once the mold is gone, we repair and restore your property to its original condition.
Our team is trained to handle mold safely and effectively, so you can have peace of mind.
Preventive Tips to Keep Mold Away
While professional remediation is essential for existing mold, prevention is key to avoiding future problems. Follow these tips:
- Control Humidity: Keep indoor humidity levels below 60%.
- Address Water Damage Quickly: Fix leaks and dry out damp areas immediately.
- Improve Ventilation: Ensure proper airflow in areas prone to moisture, such as bathrooms and basements.
As a trusted leader in the restoration industry, SERVPRO of Natick/Milford has the advanced training, experience, and equipment needed to tackle mold problems head-on. Whether you’re dealing with a minor issue or widespread mold damage, we’re here to help you restore your property to a safe and healthy condition.
Top 5 Reasons to Call Us After Water Damage
1/1/2025 (Permalink)
 Water damage can happen without warning, leaving your home or business at risk of serious and lasting harm if not addressed quickly.
Water damage can happen without warning, leaving your home or business at risk of serious and lasting harm if not addressed quickly. Here’s why contacting us after water damage is the smartest decision you can make:
1. Quick Action Prevents Mold Growth
Mold can start growing as soon as 24-48 hours after water damage occurs. Our team responds swiftly to minimize damage and stop mold growth before it causes health risks or further property damage.
2. Advanced Water Removal and Drying Equipment
We use cutting-edge technology to thoroughly remove water from your property. Our powerful pumps and specialized drying equipment can extract moisture even from hidden areas, such as behind walls and beneath floors, reducing the risk of ongoing structural issues.
3. Experienced Restoration Professionals
With years of expertise in water damage restoration, our highly trained specialists can handle every situation, from small leaks to large-scale flooding. You can trust us to restore your property safely, efficiently, and with care.
4. Support for Insurance Claims
Dealing with insurance claims after water damage can be overwhelming. We simplify the process by working directly with your insurance provider, providing detailed documentation and expert guidance to ensure you get the compensation you deserve.
5. Success Stories You Can Trust
Homeowners and businesses have relied on us to restore their properties after water damage. From saving a flooded basement after a burst pipe to helping a business reopen quickly following storm flooding, our proven results showcase our dedication to excellence.
Don’t let water damage disrupt your life. As a trusted leader in the restoration industry, Natick/Milford has the expertise, advanced tools, and training to restore your property to its pre-damage condition.
Frozen Pipes and Ice Dams: What to Do If You Return to Winter Water Damage
12/10/2024 (Permalink)
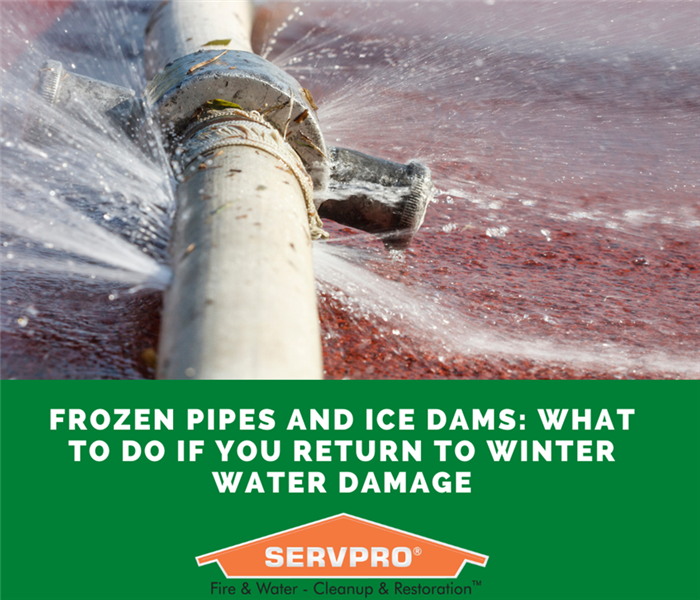 At SERVPRO of Natick, Milford, we have the advanced training and equipment to restore your home or business to its pre-damage condition.
Winter vacations are a wonderful way to relax, but discovering frozen pipes or water damage upon returning home is anything but.
Cold temperatures can lead to frozen pipes and ice dams, which often result in leaks and costly repairs if left unaddressed. Here’s what you need to know to identify, address, and prevent these winter hazards in your home.
1. Understanding the Risks: Frozen Pipes and Ice Dams
- Frozen Pipes: When water in your pipes freezes, it expands, potentially causing cracks or bursts. As the ice melts, water can flood the area, leading to significant damage.
- Ice Dams: Ice dams form when melting snow refreezes at your roof’s edge, creating a barrier. This trapped water can seep into your home, damaging walls, ceilings, and insulation.
2. Recognizing Signs of Damage
Be alert for common indicators of water damage caused by frozen pipes or ice dams:
- Water Stains on Walls or Ceilings: These may signal leaks from melting ice dams.
- Low Water Pressure: Weak faucet flow could mean a frozen pipe is blocking water.
- Pooling Water or Dampness: Look for unexpected moisture near exterior walls, basements, or under sinks.
- Frost on Pipes: In unheated areas like basements or crawl spaces, frost on pipes is a warning sign of freezing.
3. Immediate Actions to Take
If you suspect water damage, acting quickly is critical. Here’s how:
- Shut Off the Water: Turn off the main water supply to prevent further leaks.
- Cut Power to Affected Areas: Avoid the dangerous combination of water and electricity by shutting off power to rooms with flooding.
- Drain Your Pipes: Open faucets to release remaining water and reduce pipe pressure.
- Remove Standing Water: Use towels or a wet-dry vacuum to soak up water, especially on carpets or hardwood floors, to avoid mold growth.
4. Thawing Frozen Pipes Safely
If pipes are frozen but not burst, thaw them gradually:
- Apply Heat: Use a space heater, hair dryer, or heating pad. Avoid open flames or extreme heat, which could damage pipes.
- Start with Exposed Pipes: Begin thawing pipes you can easily access and work your way to harder-to-reach areas.
- Keep Faucets Open: A trickle of water through faucets can speed up thawing and encourage flow.
5. Addressing Ice Dam Damage
Ice dams can cause water to seep through your roof and down your walls, creating hidden damage:
- Check Attic Insulation: Wet or damaged insulation often signals ice dam problems. Replace it to prevent mold growth.
- Inspect Walls and Ceilings: Look for damp spots or discoloration and address them promptly to prevent further damage.
- Use a Dehumidifier: Dry out walls or ceilings with a dehumidifier after removing standing water.
6. When to Call the Experts
While minor issues can be handled yourself, professional help is recommended when:
- Significant flooding or water damage is beyond your ability to clean up.
- Mold growth has begun.
- Water has infiltrated electrical systems or insulation, creating safety hazards.
Trained professionals use advanced tools like moisture meters, industrial fans, and dehumidifiers to ensure thorough and efficient restoration.
7. Preventing Future Winter Water Damage
Protect your home from frozen pipes and ice dams with these proactive measures:
- Insulate Pipes: Wrap exposed pipes with foam or insulation tape.
- Drip Faucets: Keep faucets slightly open during extreme cold to prevent freezing.
- Maintain Attic Insulation: Proper insulation keeps your attic cold, preventing snowmelt from refreezing.
- Clear Gutters: Ensure gutters are free of debris so melting snow drains properly.
8. Prepping Your Home Before Winter Trips
Take these precautions before leaving for a winter vacation:
- Set Your Thermostat: Keep your home at a minimum of 55°F to avoid freezing.
- Shut Off Water Supply: If possible, turn off the main water valve and drain pipes before you leave.
- Open Cabinet Doors: Allow warm air to circulate around pipes in unheated areas.
Returning home from a winter getaway to discover water damage can be overwhelming, but acting quickly can turn a potential disaster into a manageable issue. By recognizing the signs of damage, taking immediate steps, and following preventive measures, you can safeguard your home against winter’s risks.
At SERVPRO of Natick, Milford, we have the advanced training and equipment to restore your home or business to its pre-damage condition.
Home Restoration 101: Recovering from Holiday Cooking Mishaps and Kitchen Fires
12/4/2024 (Permalink)
 As a trusted leader in restoration, SERVPRO of Natick/Milford has the training and equipment to restore your home
The holiday season brings cherished family gatherings and delicious feasts, but it’s also a time when cooking-related fires are more likely to occur. With the kitchen bustling, accidents can range from minor mishaps to serious fires. Taking preventive steps and knowing how to respond effectively can save you time, stress, and money. Here’s how to keep your kitchen safe and recover if the unexpected happens.
Preventing Holiday Cooking Fires
1. Stay Alert in the Kitchen
With so much activity during the holidays, distractions are common. Make it a rule to never leave a stovetop or oven unattended. If you need to step away, turn off the heat.
2. Avoid Loose Clothing
Long sleeves or loose garments can easily catch fire. Wear snug, short-sleeved clothing or roll up your sleeves when cooking.
3. Keep Flammable Items Away from Heat
Ensure towels, paper products, and wooden utensils are far from burners or open flames. Maintaining a clutter-free workspace reduces fire risks.
4. Have a Fire Extinguisher Ready
Place a kitchen-rated fire extinguisher within easy reach and familiarize yourself with its operation.
5. Be Careful with Oils and Grease
Oil and grease fires are common hazards. Monitor oil temperatures closely, and remember—never use water on a grease fire as it can spread the flames.
What to Do If a Fire Occurs
1. Turn Off the Heat
For stovetop fires, immediately turn off the burner. For an oven fire, turn off the heat and keep the door closed to cut off oxygen.
2. Smother Small Fires
Cover the pan with a metal lid or baking sheet to suffocate flames. Never attempt to extinguish fires with water or flour, which can worsen the situation.
3. Use a Fire Extinguisher if Needed
If flames grow beyond your control, use a fire extinguisher and call emergency services.
4. Ventilate the Area
After extinguishing the fire, open windows and use fans to clear smoke. Avoid using your kitchen vent hood until it’s inspected for damage.
Recovering from Fire or Smoke Damage
1. Assess the Damage
Inspect the affected areas to determine if cleanup or repairs are needed. Soot and smoke stains may appear worse than they are.
2. Clean Soot and Residue
- Soot Removal: Use a vacuum with a brush attachment for loose soot. Avoid wiping, which can spread the residue.
- Smoke Residue: Mix water, vinegar, and mild detergent. Gently clean walls, cabinets, and counters with a sponge. Rinse thoroughly and repeat as needed.
3. Eliminate Lingering Odors
- Ventilation: Open windows and use fans for cross-ventilation.
- Odor Absorbers: Sprinkle baking soda on upholstery and carpets or wipe surfaces with a vinegar solution.
- Activated Charcoal: Place charcoal or run air purifiers with HEPA filters to neutralize odors.
4. Deep Clean Appliances
- Oven and Stovetop: Follow your appliance manual for safe deep cleaning.
- Vent Hood: Remove filters and clean grease buildup. Replace filters if necessary.
5. Seek Professional Help for Severe Damage
If the damage extends beyond the kitchen or involves structural elements, contact a professional restoration service for thorough cleanup and repair.
6. Repair or Replace Damaged Areas
- Cabinets and Counters: Sand and repaint or replace burned or stained sections.
- Flooring: Address warping or stains caused by fire or water with patching or replacement.
Preventing Future Mishaps
- Clean your oven, stovetop, and vent hood regularly to reduce grease buildup.
- Test smoke detectors monthly to ensure they’re operational.
- Educate your family on kitchen fire safety and establish an emergency plan.
Cooking fires are a common holiday hazard, but with proper precautions and a clear recovery plan, you can ensure a safe and festive season.
Need Professional Help?
As a trusted leader in restoration, SERVPRO of Natick/Milford has the training and equipment to restore your home or business.


 24/7 Emergency Service


